Welcome SMS configuration
This section contains information related to configuring items such as offers, campaigns, zones, and messages from within the Tango PMI. It also gives a brief overview of list management.
| Not all configuration possibilities are covered, but these instructions will help you get started configuring the Welcome SMS on the Tango PMI. |
Configure WSMS network locations
Network locations specify certain areas within a network.
| PMI Navigation = Welcome SMS > Locations |
-
Navigate to the Locations Screen.
-
Scroll to the Network Locations section.
-
Click
Add. -
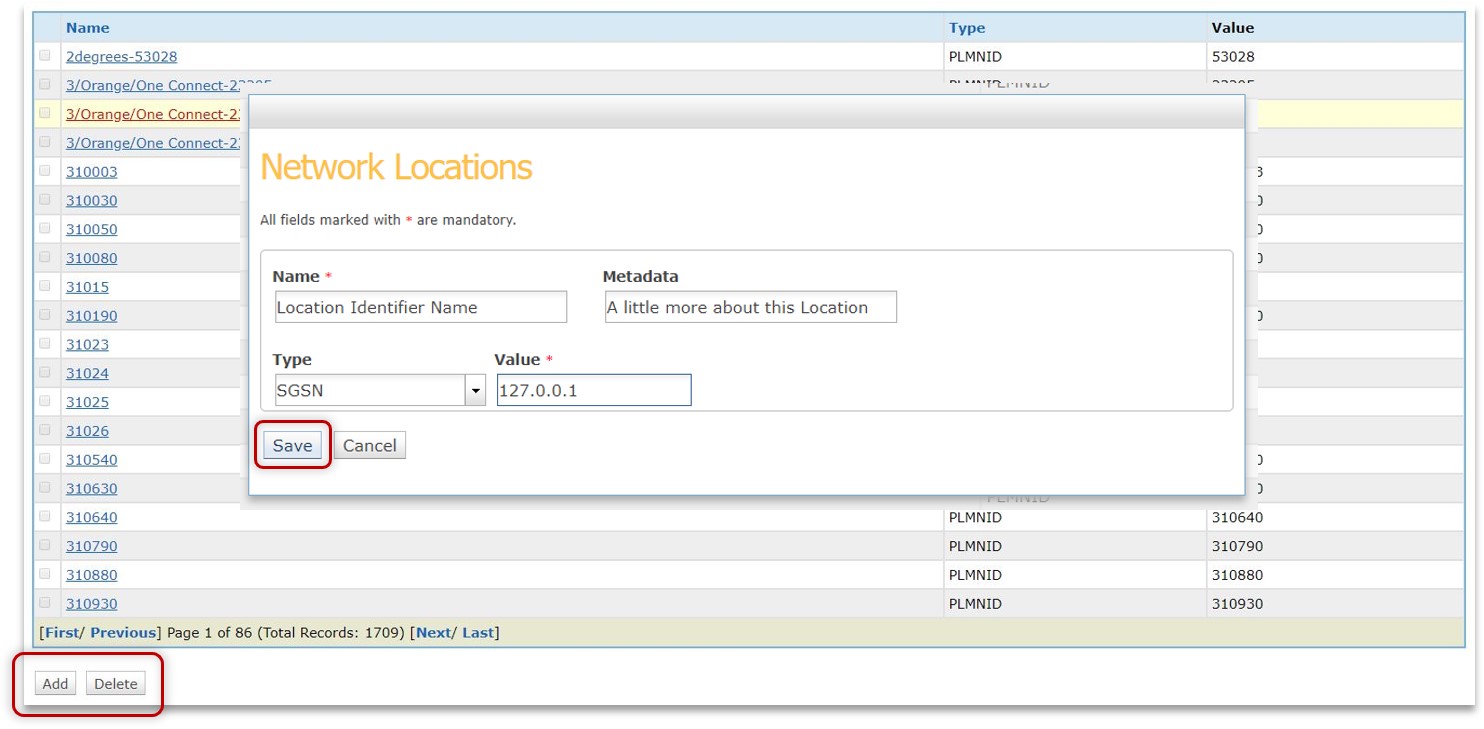
In the pop-up, add the
Name,Metadata,Network Location Type, andValue.
| See the tooltips on the screen for help completing the form. |
| To edit an existing Network Location, simply click on one from the list. |
Configure WSMS locations
Locations are made up of network locations which are defined in Configure Network Locations.
| PMI Navigation = Welcome SMS > Locations |
-
Navigate to the Locations Screen.
-
Scroll to the Locations section.
-
Click
Add. -
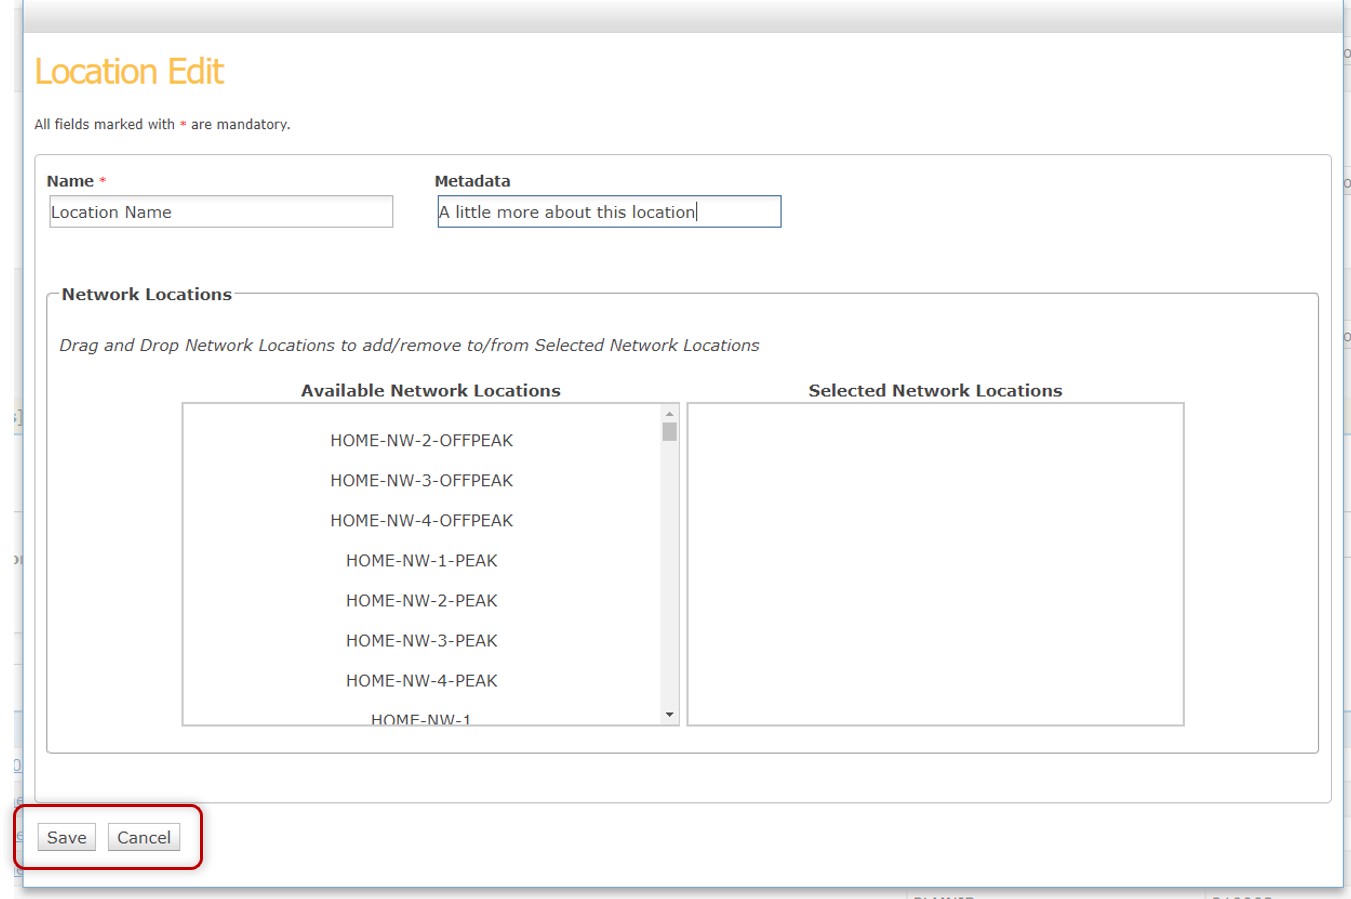
In the pop-up, drag and drop the
Network Locationsyou want to include in the Location.
| See the tooltips on the screen for help completing the form. |
| To edit an existing Location, simply click on one from the list. |
Configure WSMS zones
Zones are made up of Locations Profiles which are defined in Configure Location Profiles.
| PMI Navigation = Welcome SMS > Locations > Zones (tab) |
-
Navigate to the Locations Screen.
-
Scroll to the Locations section.
-
Choose the
Zonestab. -
Click
Add. -
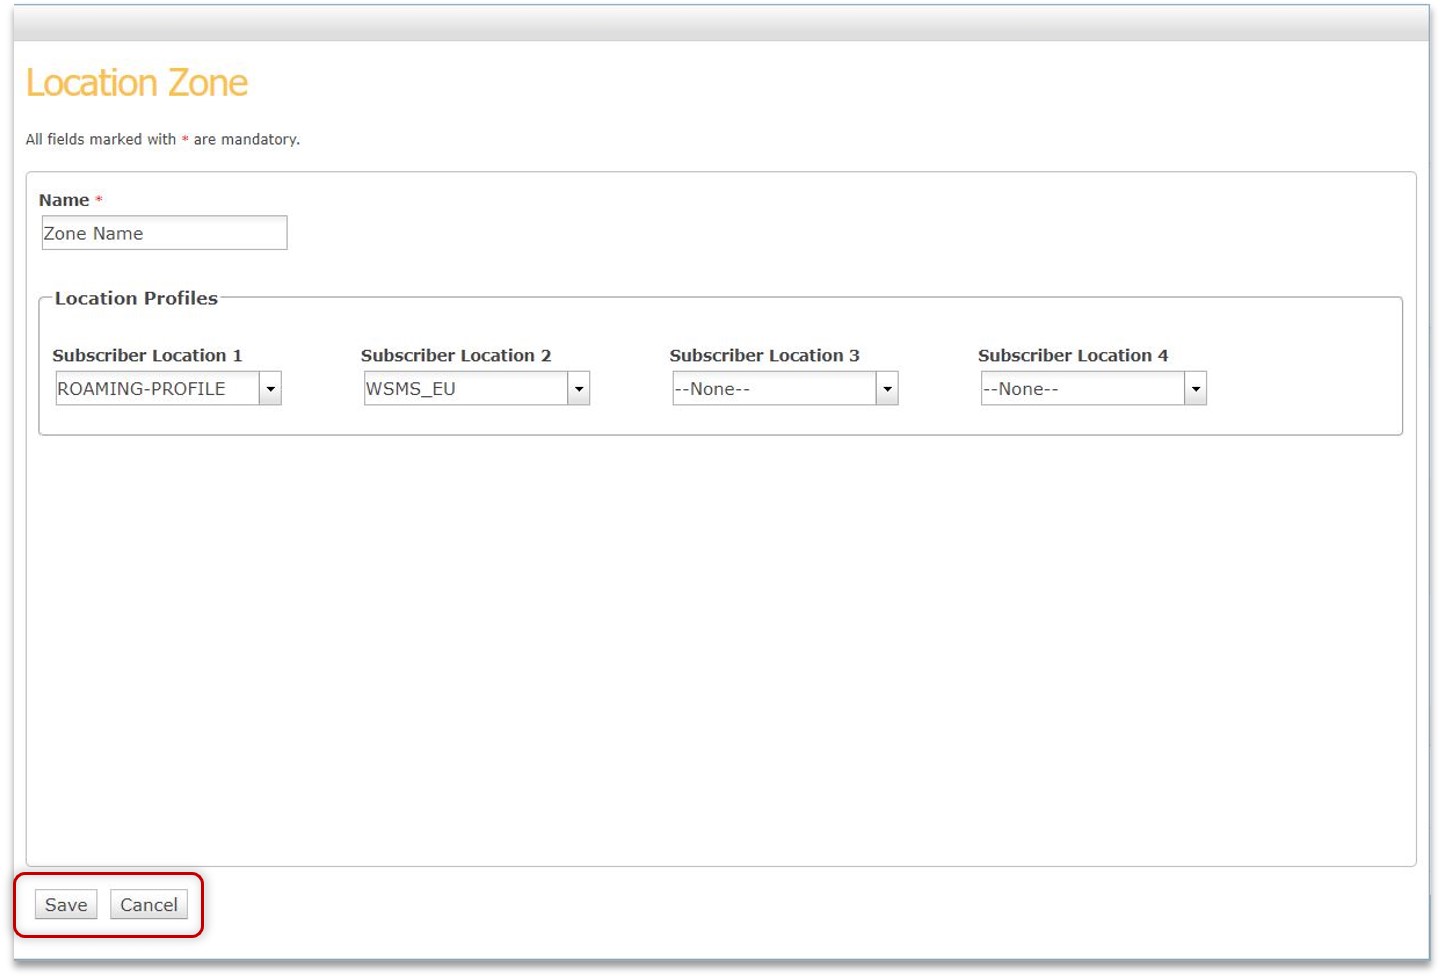
In the pop-up, give the zone a name and add your desired Subscriber Locations.
| See the tooltips on the screen for help completing the form. |
| To edit an existing Zone, simply click on one from the list. |
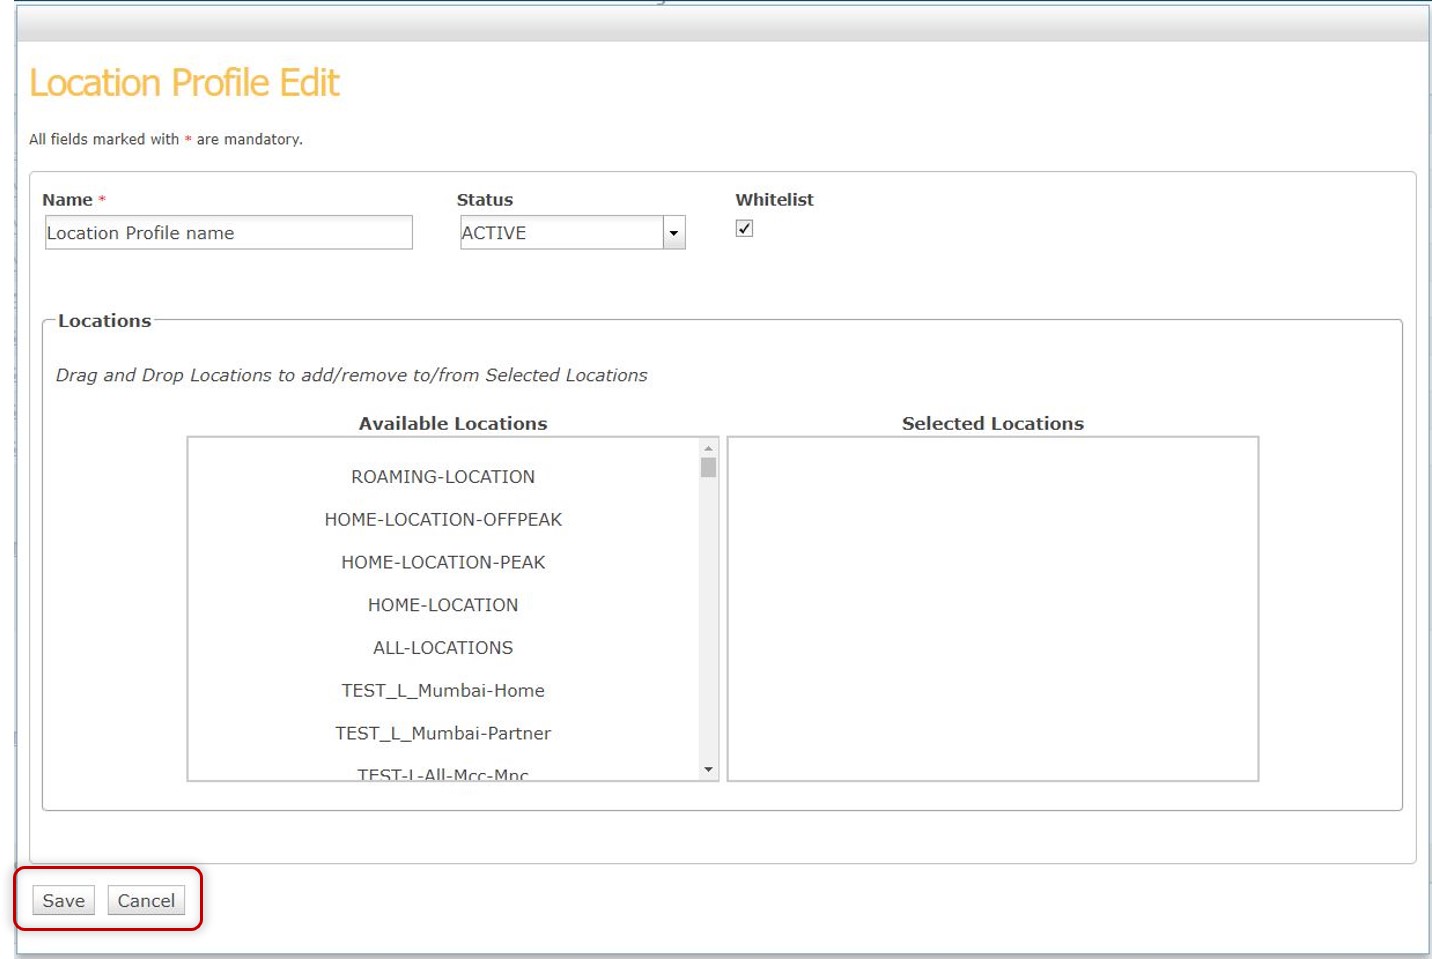
Configure WSMS location profiles
Location Profiles are made up of Locations which are defined in Configure Locations.
| PMI Navigation = Welcome SMS > Locations |
-
Navigate to the Locations Screen.
-
Scroll to the Location Profiles section.
-
Click
Add. -
In the pop-up, drag and drop the
Locationsyou want to include in the Location Profile. -
Select the status from the dropdown menu and whether or not you want a whitelist.
| See the tooltips on the screen for help completing the form. |
| To edit an existing Location Profile, simply click on one from the list. |
Configure WSMS offers
Offers are ways to engage with subscribers by offering data or other set options.
| PMI Navigation = Welcome SMS > Offers |
-
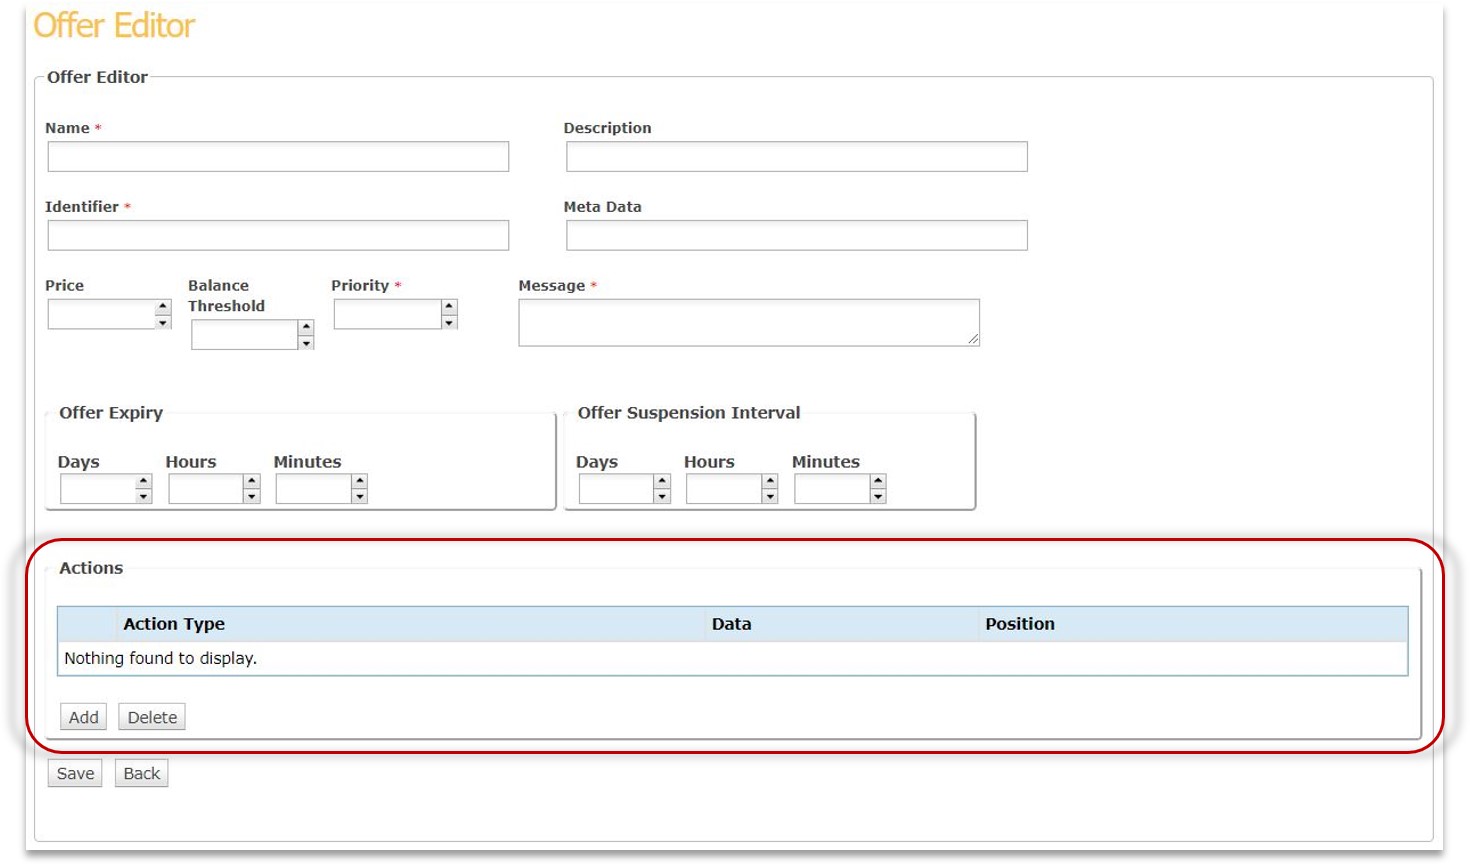
Navigate to the Offers Screen.
-
Click
Add. -
In the pop-up, add the
Name,Description,Identifier,Metadata,Priority, andMessage. -
If desired, you can add an
ActionorOffer Expiry, but these are not mandatory. See welcome-sms-guide#actions, Offer Actions for more details.
| See the tooltips on the screen for help completing the form. |
| To edit an existing WSMS Offer, simply click on one from the list. |
Configure WSMS campaigns
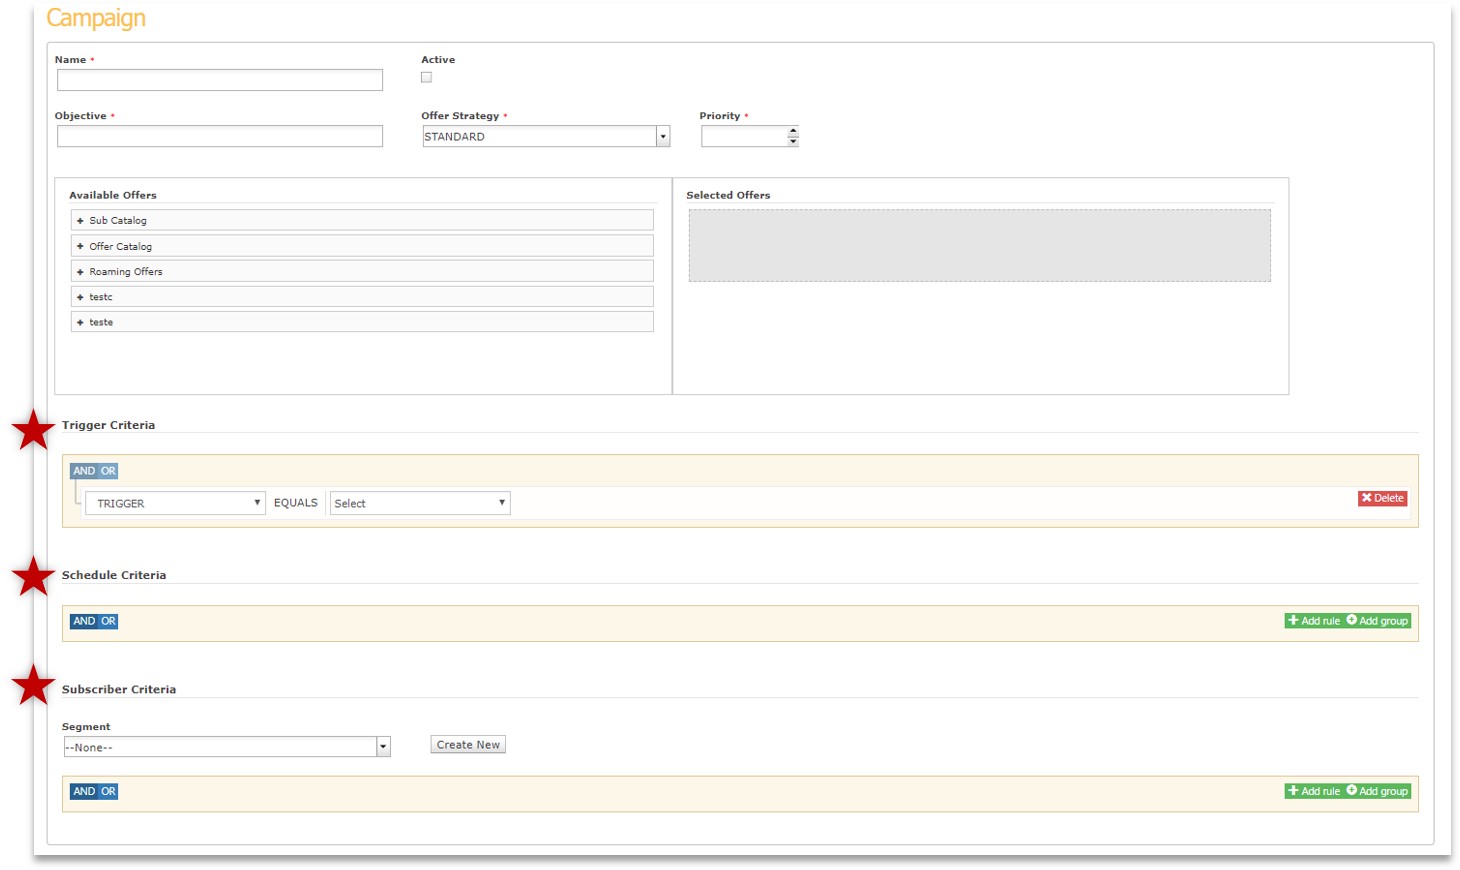
Campaigns are made up of offers and are set to target certain subscriber groups and can be configured to be triggered or scheduled to run based off defined criteria.
| PMI Navigation = Welcome SMS > Campaigns |
-
Navigate to the Campaigns Screen.
-
Click
Add. -
In the pop-up, add the
Name,Objective,Offer Strategy, andPriority. -
Drag and drop available offers into the selected offers column.
-
Set any
trigger,schedule, andsubscribercriteria.
| See the tooltips on the screen for help completing the form. |
| To edit an existing Campaign, simply click on one from the list. |
Configure WSMS lists
Lists are managed through CSV files and are set to meet specifici customer requirements.
| Contact Tango support for more details. |
| PMI Navigation = Welcome SMS > List Admin |
-
Navigate to the List Admin Screen.
-
Click
Choose file. -
Add your
.csvfile that includes your list.
| You can search for lists jobs here as well. |

Configure WSMS actions
You can add actions easily to offers through the PMI. Some of these included offer delay and message debounce.
| PMI Navigation = Welcome SMS > Offers > Actions (new or existing offer) |
-
Navigate to the Offers Screen.
-
Click
Addfor a new offer or select an existing offer. -
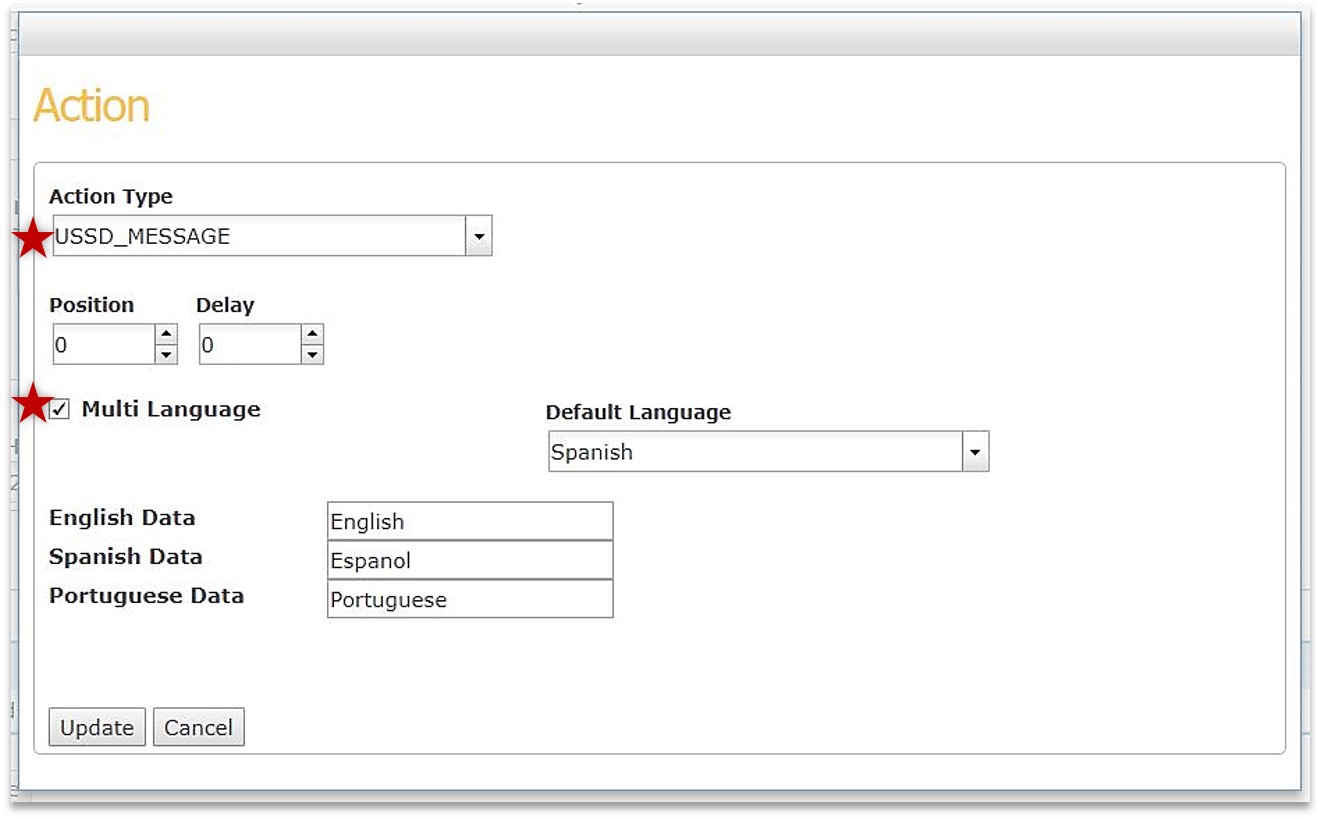
In the pop-up, add the
Action Typefrom the dropdown menu,Position, andDelay. -
Select if you want to have multi-language actions, otherwise, it will be in the default language for you location. If multi-language is selected, select your default language and add messages for the secondary languages.
Position and Delay can be configured to delay certain actions (seconds).
|
Currently, only English, Spanish, and Portuguese are available.
|
